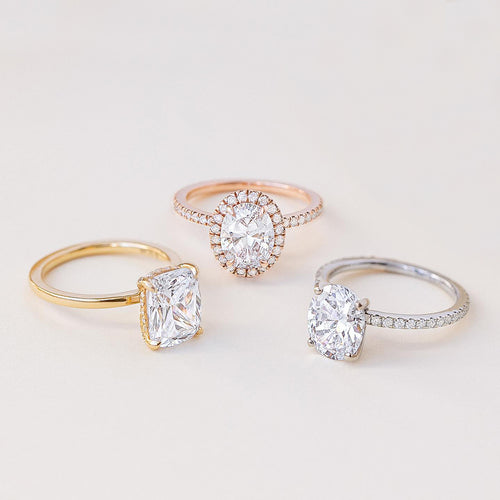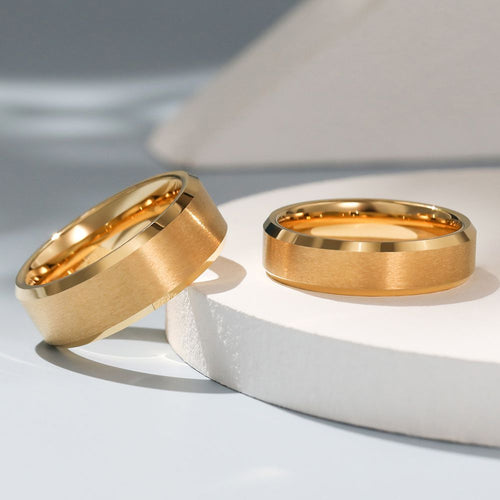


To make jewelry, choose a method that matches the piece, draw or measure the design, select compatible materials, build a prototype, assemble or form the components, finish every surface, and inspect the result for comfort and security. A beginner can make a wearable pendant necklace with premade chain, one pendant, a jump ring, and two jewelry pliers. Fine jewelry production adds engineering, casting or fabrication, stone setting, polishing, plating, and documented quality control.
The fastest safe starting point is a no-flame project. It teaches the essential habits of jewelry making: measuring before cutting, using the correct tool, protecting the finish, closing connections accurately, and checking how the piece behaves when worn. Soldering, casting, pickling, electroplating, and high-speed rotary work are separate skills that require training, ventilation, personal protective equipment, and a purpose-built workspace.
What Is Jewelry Making?
Jewelry making is the design and construction of objects intended to be worn, including rings, earrings, necklaces, bracelets, brooches, charms, body jewelry, and related accessories. The maker may assemble ready-made components, shape wire or sheet, carve wax, model a piece in computer-aided design software, cast metal, set stones, or combine several methods in one product.
There is no single answer to how jewelry is made because the method follows the design. A beaded bracelet is usually strung and finished with a clasp or elastic system. A chain necklace may be assembled from links and findings. A sterling silver ring may be fabricated from sheet and wire or cast from a wax or printed resin model. A stone-set engagement ring may require CAD engineering, casting, pre-polishing, setting, final polishing, and inspection.
The useful distinction is between assembly and manufacturing. Assembly connects finished parts such as chain, clasps, charms, head pins, and beads. Manufacturing changes raw material through cutting, forming, joining, machining, casting, or surface treatment. Many independent makers do both, while larger production teams divide the work among designers, model makers, casters, bench jewelers, setters, polishers, plating technicians, and quality inspectors.
Choose the Right Jewelry-Making Method
Start with the finished object and work backward. Consider its shape, material, expected wear, number of units, level of detail, stone requirements, and available equipment. The following comparison shows where common methods fit.
| Method | Typical Pieces | Core Tools | Heat or Chemicals | Learning Curve | Main Limitation |
|---|---|---|---|---|---|
| Bead stringing | Beaded necklaces and bracelets | Bead board, cutter, crimping pliers | Usually none | Beginner | Durability depends on stringing material, hole edges, and termination quality |
| Chain and finding assembly | Pendant necklaces, charm bracelets, simple earrings | Two pliers, flush cutter, ruler | Usually none | Beginner | Design is constrained by available components |
| Wire wrapping | Wrapped stones, links, ear wires, pendants | Round-nose and chain-nose pliers, cutters, mandrels | Usually none | Beginner to intermediate | Consistency and smooth wire ends require practice |
| Cold connection and stamping | Stamped tags, riveted forms, textured sheet pieces | Bench block, hammer, punches, files, riveting tools | No flame; impact and sharp-edge controls needed | Beginner to intermediate | Noise, marking accuracy, and edge finishing |
| Soldered fabrication | Rings, bezels, chains, sheet-metal forms | Jeweler's saw, files, torch, soldering surface, forming tools | Yes; flame, flux, fumes, and cleaning chemicals | Intermediate to advanced | Needs formal safety training and controlled heat |
| Lost-wax casting | Detailed rings, pendants, repeatable collections | Model-making and professional casting equipment | Yes; high heat, investment dust, and molten metal | Advanced or outsourced | Shrinkage, porosity, cleanup, and process control |
| CAD, printing, and casting | Custom rings, precise settings, scalable product families | CAD software, calibrated printer or service bureau, casting workflow | Model stage varies; casting requires industrial controls | Intermediate to advanced | A render can look good while wall thicknesses or settings remain unmanufacturable |
| Stone setting | Prong, bezel, pave, channel, and flush-set jewelry | Magnification, burs, gravers, setting tools, secure workholding | May involve powered tools and later cleaning | Advanced | Stone and setting can be permanently damaged by poor seat geometry or tool control |
How to Make a Simple Pendant Necklace
This project teaches assembly without heat. Use adult jewelry components from a reputable supplier and confirm that the chain, clasp, jump ring, and pendant are compatible in metal, color, dimensions, and intended load.
What you need
- A finished chain at your chosen length, or cut chain plus a clasp and end ring
- A pendant or charm with a bail or attachment hole
- One jump ring with a wire thickness and inside diameter that fit the pendant and chain
- Two smooth-jaw chain-nose or flat-nose jewelry pliers
- A ruler or flexible measuring tape
- A soft work mat and good task lighting
- Eye protection, especially when cutting wire or chain

Step 1: Confirm the finished length
Lay the chain straight without stretching it. Measure the full wearable length, including the clasp, and add any extender only if it is part of the plan. Pendant height changes the visual drop, so compare the lowest point of the pendant rather than judging the chain alone. If the piece is a gift, use an adjustable extender or verify the intended fit instead of assuming one standard length suits everyone.
Step 2: Check the component fit
The jump ring must pass through both the pendant attachment and the chain link. Its wire should be substantial enough for the pendant but not so thick that it forces or damages the opening. Check that the pendant faces forward when the necklace hangs. Some bails naturally rotate a pendant by 90 degrees and require a second connector or a differently oriented bail.
Step 3: Open the jump ring correctly
Hold one side of the jump ring with each pair of pliers. Keep the cut seam at the top. Move one hand slightly toward you and the other slightly away, twisting the ring open sideways. Do not pull the ends outward like opening a letter C. Sideways movement preserves the round shape and makes accurate closing easier.
Step 4: Add the pendant and chain
Slide the pendant attachment and the selected chain link onto the open ring. Keep both parts inside the ring while you reposition the pliers. Avoid scraping plated surfaces with sharp or serrated jaws. Protective nylon-jaw pliers can help with delicate finishes, although they do not replace controlled hand pressure.
Step 5: Close the ring
Reverse the sideways motion until the cut ends meet. A tiny back-and-forth movement can help the ends seat against each other. Inspect the seam under bright light. The ends should be aligned with no visible step or gap that could release a fine chain. Do not repeatedly bend the ring; excessive work can deform or fatigue the metal.
Step 6: Inspect and wear-test
Run a fingertip and a piece of fine fabric around the connection to find rough edges. Open and close the clasp several times. Hold the necklace over a soft surface and apply a gentle load appropriate to normal wear; do not perform a destructive pull test on a finished personal piece. Put it on, turn your head, and confirm that the pendant faces correctly, the clasp remains at the back, and no component pinches or scratches.
Essential Jewelry-Making Tools for Beginners
A small set of reliable tools is better than a large kit of poorly matched tools. Choose jewelry tools with smooth working surfaces, comfortable handles, aligned jaws, and clean cutting edges.
- Chain-nose pliers: grip jump rings, bend wire, and reach into narrow spaces. Smooth jaws reduce unwanted marks.
- Round-nose pliers: form loops and curves. Because the jaws taper, marking a repeatable position helps produce consistent loop diameters.
- Flush cutters: cut suitable jewelry wire with one flatter side and one pinched side. Use only within the tool's specified material and gauge.
- Crimping pliers: form compatible crimp tubes in beaded jewelry. The crimp, wire, and tool must be designed to work together.
- Ruler and calipers: measure length, wire diameter, bead size, stone dimensions, and component openings. Calipers improve repeatability but should not be forced onto fragile stones or finishes.
- Needle files and abrasive papers: remove burrs and refine edges. Use material-appropriate grades and keep dust controlled.
- Bench block and small hammer: support stamping, texturing, and controlled flattening. Wear eye protection and manage noise.
- Mandrels: form rings, bracelets, loops, and consistent curves. A mandrel is a forming reference, not automatically an accurate sizing standard unless it is calibrated for that purpose.
- Work mat and trays: keep small parts visible and prevent stones or findings from bouncing onto the floor.
- Task light and magnification: make seams, burrs, alignment, and surface damage easier to see before the piece is worn.
Keep jewelry tools separate from household food tools. Label compounds and materials, retain safety data sheets where applicable, and store sharp tools and small components away from children and pets. A dedicated bench also prevents fragments, polishing residue, and metal dust from moving into living or food-preparation areas.
How to Choose Jewelry Materials
Material selection affects color, weight, stiffness, corrosion behavior, skin contact, cost, finishing, and manufacturing method. The supplier's description is only the beginning; record the alloy or material specification, finish, dimensions, and batch information needed for the project.
Sterling silver
Sterling silver is nominally 92.5 percent silver combined with other metals to improve working properties. It can be formed, soldered, cast, polished, textured, oxidized, or plated by trained makers. It can tarnish, so a finished piece may need periodic cleaning and protective storage. For production or resale, do not infer the complete alloy or nickel status from a "925" stamp alone; obtain material declarations or relevant test documentation for the actual product.
Designers developing a silver collection can compare construction and merchandising options in Oahlan's wholesale 925 silver jewelry range. That commercial reference is most useful after the design brief identifies the intended customer, price position, finish, stone type, and order quantity.
Gold and gold alloys
Pure gold is soft, so jewelry uses karat alloys selected for color, hardness, workability, and wear. Solid gold, gold-filled material, vermeil, and gold-plated base metal are different constructions. Describe them accurately. A gold-colored surface does not reveal the substrate or plating thickness, and plating performance depends on the complete layer system, surface preparation, thickness, use conditions, and care.
Brass and copper
Brass and copper are accessible for practice, prototypes, stamping, wire work, and fashion jewelry. They may darken or react with moisture and skin chemistry. Edges and surfaces still require professional finishing, and coatings must be suitable for the intended use. Do not assume an unknown brass component is free from restricted substances.
Stainless steel
Stainless steel can offer strength, corrosion resistance, and a modern finish, but it is generally harder to saw, form, solder, and polish than soft nonferrous jewelry metals. Grade, work hardening, tools, and finishing method matter. Many makers begin by assembling finished stainless components rather than fabricating the alloy at a small home bench.
Titanium and tungsten carbide
Titanium is light and corrosion resistant, while tungsten carbide is dense, hard, and highly scratch resistant in many wear situations. Neither behaves like sterling silver at the bench. Their machining, joining, finishing, and sizing constraints require specialized equipment and design decisions. A conventional precious-metal resizing method may not apply to a titanium or tungsten ring.
Beads, pearls, and gemstones
Check each bead hole for rough edges and consistent size. Match the cord or wire to the hole and expected movement. Pearls and many gems can be damaged by heat, chemicals, impact, ultrasonic cleaning, or aggressive polishing. Identify the material and treatment before selecting a setting or cleaning process. When identity matters, use qualified gemological testing rather than appearance alone.
Plan the Design Before You Cut
A design sketch does not need to be artistic, but it should answer practical questions. Record the front, side, and connection views; finished dimensions; material; component sizes; stone measurements; clasp or ear-fitting type; surface finish; and any movable parts. Add a scale or reference dimension so the drawing cannot be misread.
For a one-off beginner piece, make a full-size paper layout or arrange the components on a bead board. For a repeatable product, create a specification sheet and bill of materials. Number each component, name the supplier, record the size and finish, and note approved substitutions. A photograph of the approved sample helps, but it does not replace dimensions or material records.
Consider the wearer while designing:
- Will the piece contact skin continuously or only occasionally?
- Can the clasp be operated with one hand?
- Are there points, burrs, exposed wire ends, or settings that can catch?
- Does a pendant flip, a ring rotate, or an earring pull forward?
- Can moving parts abrade plating or scratch a softer adjacent material?
- Is the item intended for adults or children, and which product rules apply in the destination market?
- Can the design be cleaned, repaired, and packaged without damage?
A prototype answers these questions before expensive materials or a full production batch are committed. Wear-test or fit-test the prototype under realistic conditions, document changes, and freeze an approved sample only after the functional issues are resolved.
How Professional Jewelry Is Made
Professional production is a controlled sequence rather than one technique. Hand fabrication and digital manufacturing often work together: a CAD model may produce a cast component that is later assembled, set, polished, plated, and inspected by hand.

1. Brief and specification
The project begins with the customer, target price, material, size range, design language, finish, stone plan, expected quantity, compliance market, packaging, and delivery requirements. A clear brief prevents a beautiful concept from becoming commercially unsuitable.
2. Sketch and CAD engineering
The designer develops proportions and details, then chooses hand fabrication or a digital model. CAD allows precise symmetry, repeated motifs, dimensional changes, estimated volume, and several size variants. It does not automatically make a design manufacturable. Wall thickness, prong dimensions, stone seats, tolerances, casting behavior, polishing access, comfort, and assembly order still require jewelry engineering judgment.
3. Prototype or master model
A prototype may be built in inexpensive metal, carved in wax, milled, or printed in resin. It lets the team check scale, silhouette, fit, assembly, stone relationships, and surface access. A master intended for molding also needs compensation for the chosen reproduction and finishing process.
4. Fabrication, molding, or casting
Fabricated jewelry is cut, formed, forged, soldered, laser welded, riveted, or otherwise joined from sheet, wire, tube, and components. In lost-wax casting, one or more wax or castable models are attached to a feed system, invested in a heat-resistant material, removed during burnout, and replaced by molten metal in controlled industrial equipment. After cooling, the investment is removed and the cast parts are separated for cleanup.
Casting is not a shortcut around craftsmanship. Feed design, model orientation, metal preparation, temperature control, investment handling, shrinkage, porosity prevention, and post-cast finishing all affect the result. These operations involve high heat, dust, pressure or vacuum equipment, and molten metal, so they belong in a trained and properly controlled facility.
5. Assembly and pre-polishing
Components are fitted and joined in an order that preserves access to seams and settings. Areas that will become difficult to reach after assembly or stone setting are finished first. The maker removes casting gates, refines surfaces, corrects seams, and checks dimensions. Over-polishing can erase design edges, thin prongs, change dimensions, or round intentional geometry.
6. Stone setting
The setter verifies the stone dimensions and condition, prepares a seat, secures the stone with the intended setting structure, and checks alignment and security under magnification. Prongs should hold the stone without unnecessary pressure or snagging. Pave, channel, bezel, flush, and tension-style settings each require different geometry and tool control. Valuable, brittle, included, filled, coated, or heat-sensitive stones require specific handling.
7. Final finish and optional plating
The final surface may be mirror polished, brushed, sandblasted, hammered, oxidized, coated, or plated. Preparation determines how cleanly a finish reads; plating does not hide scratches, pits, or uneven polishing. A plating specification should identify the substrate, underlayers where used, final metal and color, target thickness or agreed process standard, protected areas, and test or inspection method.
8. Quality control and packaging
The final inspection compares the product with the approved sample and specification. The team checks dimensions, symmetry, surface, seams, moving parts, closures, settings, markings, color, cleanliness, and packaging. Batch production may use in-process inspection, sampling plans, measurement records, and corrective action for defects. Packaging should prevent pieces from striking, rubbing, tangling, or reacting with unsuitable materials during storage and shipping.
A brand moving from concept to repeatable production can use a structured custom jewelry service to coordinate CAD, prototyping, material decisions, samples, production, finishing, and packaging around one approved specification.
Jewelry-Making Safety: Where Beginners Should Stop
Start with methods that match your training and workspace. Basic assembly still involves sharp wire, springing components, small parts, and repetitive hand movements, so use eye protection when cutting, direct cut ends away from people, maintain good lighting, and keep the bench organized.
Seek qualified instruction before using a torch, kiln, casting machine, laser welder, acid pickle, electroplating bath, pressurized gas, high-speed rotary equipment, or unfamiliar chemical. Professional controls may include local exhaust ventilation, machine guarding, fire-resistant surfaces, compatible storage, spill procedures, personal protective equipment, and exposure monitoring. A fan or open window is not a universal substitute for engineered ventilation.
Use current safety data sheets and follow the equipment and chemical manufacturers' instructions. Never mix unknown chemicals. Do not eat, drink, or prepare food at the jewelry bench. Control dust at its source and clean it with a method appropriate to the material; dry sweeping can put fine particles back into the air. Wash hands after handling metal, abrasives, polishing compounds, or chemicals.
Product safety also matters. Children can mouth or swallow small jewelry parts, and destination markets may restrict lead, cadmium, nickel release, and other substances. Adult-jewelry practices do not automatically satisfy children's product requirements. When a material claim or market rule matters, obtain documentation and test the representative finished product through a qualified laboratory.
How to Check the Quality of Handmade Jewelry
Inspect the piece in bright, neutral light and under magnification. Turn it through every angle; the back and inside should be intentionally finished, not ignored because they are less visible.
- Dimensions: compare length, width, thickness, ring size, and stone position with the plan.
- Edges: feel for burrs, sharp corners, exposed wire ends, and snagging surfaces.
- Connections: inspect jump-ring seams, crimps, solder joints, rivets, and link alignment.
- Closures: operate clasps, earring backs, hinges, and safety catches repeatedly.
- Stone security: inspect seats, prongs, bezels, channels, and movement using an appropriate non-damaging method.
- Symmetry and orientation: confirm that pairs match and pendants, posts, bails, and decorative elements face correctly.
- Surface finish: look for scratches, pits, tool marks, polishing residue, plating gaps, uneven texture, and rounded details.
- Comfort: check weight distribution, contact points, articulation, and how the piece behaves during normal movement.
- Cleanliness: remove residue using a method safe for every metal, finish, adhesive, and gemstone in the piece.
- Records: confirm that the material, size, finish, care instructions, and product description match the finished item.
Do not rely on a single aggressive pull, scratch, or chemical test copied from social media. A test can damage the product without proving the claim it is supposed to verify. Use calibrated measurements, defined inspection criteria, supplier documentation, and qualified laboratory methods when objective evidence is required.
How to Make Jewelry for a Small Business
A sellable design must be repeatable, costed, described accurately, and supported after purchase. Before launching, produce a pilot batch rather than assuming the first sample represents normal production.
Create a bill of materials
List every component, material, stone, finding, finish, package, and consumable. Record units, approved suppliers, lead times, minimum order quantities, and substitutions. Small findings can control the entire production schedule, so treat clasps, posts, backs, jump rings, and stones as critical parts rather than afterthoughts.
Calculate the true cost
Include material, labor, sampling, rejected parts, tools, consumables, plating, testing, packaging, freight, platform fees, duties, photography, customer service, and returns. Labor includes design, sourcing, setup, finishing, inspection, and administration, not just minutes spent assembling the piece.
Define tolerances
Handmade does not mean undefined. State acceptable ranges for dimensions, weight where relevant, stone size, color, plating, chain length, paired-piece matching, and surface appearance. Natural materials may vary, but the acceptable character and range of variation should still be documented.
Approve a sample and pilot batch
Mark one sample as the visual and functional standard, then make enough pilot units to expose inconsistent steps. Record defects and revise the process before scaling. A design that takes 20 minutes once may take longer when tools wear, components vary, or several operations compete for bench space.
Write accurate product information
Describe the base material, finish, dimensions, gemstone identity, closure, care, and any meaningful variation. Distinguish solid metal from plated construction and natural stones from laboratory-grown or simulated materials. Avoid unsupported claims such as waterproof, hypoallergenic, lifetime finish, or certified purity unless the exact finished product and evidence justify them.
Common Jewelry-Making Mistakes
- Starting with a complex ring: fit, symmetry, settings, heat control, and finishing converge in a small object. Begin with assembly or a simple wire exercise.
- Buying parts before drawing the connection: a pendant hole, jump ring, chain link, and clasp can each be good yet incompatible together.
- Pulling jump rings open: this distorts the ring and makes the seam difficult to close.
- Using serrated household pliers: rough jaws mark soft metal and plating. Use smooth jewelry pliers for visible components.
- Cutting hard wire with delicate cutters: the wrong material or gauge can chip the cutting edge and send fragments outward.
- Skipping edge finishing: a polished front cannot compensate for a sharp back, exposed wire, or rough ear post.
- Choosing appearance over compatibility: mixed metals, coatings, adhesives, stringing materials, and stones must tolerate the same assembly and cleaning process.
- Copying an image without engineering the back: connection points, thickness, setting depth, articulation, and wear are usually invisible in a front-view reference.
- Scaling before testing: an unproven sample multiplies defects as efficiently as it multiplies good work.
- Making claims from color or stamps alone: visual inspection cannot establish complete alloy composition, plating thickness, or restricted-substance compliance.
Frequently Asked Questions
1. What is the easiest jewelry to make for a beginner?
A pendant necklace, stretch bracelet, or simple beaded necklace is usually easiest. Choose a no-flame method with few components and practice measuring, opening and closing connections, finishing ends, and inspecting the result.
2. Can I make jewelry without soldering?
Yes. Bead stringing, wire wrapping, chain assembly, some riveted designs, and many charm-based pieces use mechanical connections instead of solder. The connection still needs to be selected and closed for the expected load.
3. What tools do I need to start making jewelry?
For basic assembly, start with two smooth-jaw pliers, round-nose pliers, a suitable flush cutter, ruler, work mat, task light, and eye protection. Add crimping pliers, files, mandrels, or a bench block only when the chosen method needs them.
4. How do I make jewelry at home safely?
Use a dedicated, well-lit bench and begin with no-flame assembly. Keep food away, control sharp ends and small parts, wear eye protection when cutting, follow tool limits, and stop before any process that needs engineered ventilation, heat, chemicals, or specialized training.
5. How do you make a necklace from scratch?
Define the finished length and focal point, choose compatible chain or stringing material, plan the clasp and connections, assemble the components, finish every cut end, then inspect the closure, comfort, orientation, and movement. "From scratch" may mean assembling findings or fabricating every component, so define the intended level first.
6. How is fine jewelry made?
Fine jewelry may be hand-fabricated, cast, machined, or made through a combination of CAD, printed or carved models, casting, assembly, stone setting, polishing, optional plating, and quality inspection. The sequence depends on the alloy, gemstones, geometry, and production quantity.
7. What is lost-wax jewelry casting?
Lost-wax casting uses a wax or castable model to create a cavity in a heat-resistant investment. After the model is removed during a controlled burnout, molten metal fills the cavity. The cast piece is then released, cleaned, finished, and inspected. It is an industrial high-heat process.
8. Is CAD jewelry handmade?
CAD describes the digital design stage, not the entire labor category. A CAD-designed piece may be printed, cast, assembled, set, polished, and inspected through extensive skilled handwork. A more useful description identifies both the digital and physical processes used.
9. Which metal is best for making jewelry?
There is no universal best metal. Sterling silver is versatile for many bench and casting methods; gold alloys suit fine jewelry; brass and copper are accessible for practice; stainless steel, titanium, and tungsten require different tooling and expertise. Choose by wear, budget, color, workability, finish, and compliance needs.
10. Can I use regular pliers to make jewelry?
Household pliers may grip parts, but serrated or damaged jaws can mark soft metal and coatings. Jewelry pliers with aligned, smooth jaws provide better control for visible components. Never exceed a tool's intended wire hardness or diameter.
11. Why do my jump rings keep opening?
The ring may be too thin, too soft, too large for its wire diameter, distorted during opening, or incompletely closed. The load or movement may also be unsuitable for an unsoldered ring. Select a compatible size and construction, twist it open sideways, and align the seam precisely.
12. How long does it take to learn jewelry making?
Basic assembly can produce a first wearable piece in one session. Consistent wire work takes repeated practice, while fabrication, soldering, casting, CAD engineering, and stone setting can require months or years of guided training. Competence should be measured by repeatable quality and safe process control, not time alone.
13. How much does it cost to start making jewelry?
A no-flame assembly setup can begin with a small set of tools and components, while a professional bench, casting operation, plating line, or digital production workflow costs much more. Set the project first, price only the necessary tools, and outsource advanced processes until demand justifies equipment and training.
14. How do I make jewelry that will not break?
Match component dimensions and materials to the load, avoid sharp stress points, close or join connections correctly, protect flexible parts from abrasion, and inspect every seam, crimp, clasp, setting, and edge. Prototype and wear-test the design, then document the approved construction for repeat production.
15. Can handmade jewelry be mass-produced?
Yes. A hand-created design can become a master model, mold, casting pattern, production jig, documented assembly, or CAD product family. Scaling succeeds when the approved sample, materials, tolerances, process sequence, inspection criteria, and packaging are defined before the full batch.
Final Checklist
For a first project, choose a no-flame method, buy compatible components, measure the finished piece, practice each connection on spare material, finish every edge, and inspect the result under bright light. For professional production, add a documented specification, prototype, approved sample, manufacturing plan, material evidence, in-process checks, final quality control, and packaging test.
The central lesson is simple: learning how to make jewelry is not only learning how to shape or connect materials. It is learning how design, material behavior, tools, comfort, safety, finish, and verification work together. A secure, wearable, accurately described piece is the real finished product.
OahlanJewelry Blog Tips
Readers are welcome to read the message and comments, and give their opinions, we will humbly adopt. Reproduction is prohibited without the permission of Oahlan.
Sample lookbook gallery