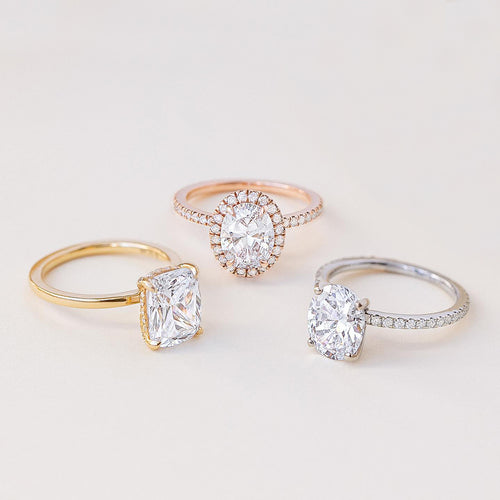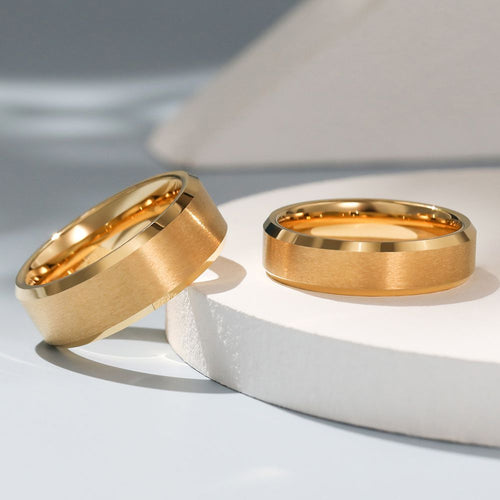


To design a ring, begin with a clear brief: who will wear it, how often it will be worn, the required ring size, budget, preferred metal, stone choice, and visual style. Turn that brief into sketches, select a ring architecture, define the profile and dimensions, create a CAD model or measured drawing, review a physical prototype, and approve a production sample only after checking comfort, stone security, finish, and manufacturability.
A beautiful rendering is not yet a successful ring. The design must work from every angle, fit the intended finger, protect the stones, survive normal wear, and be repeatable in the chosen material and production process. This guide explains how to design a ring for yourself, a custom order, or a jewelry collection without skipping the decisions that determine the final result.
What Does It Mean to Design a Ring?
Designing a ring means converting an idea into a wearable object with defined visual and technical properties. The visible concept may begin with a mood, symbol, stone, historical reference, or customer request. The technical design determines how that idea becomes a ring: the inside diameter, band profile, stone seat, setting height, shoulder structure, surface finish, and manufacturing route.
A ring has no hidden back side in the way a pendant often does. The wearer sees it from above, but also notices its profile, underside, interior, and relationship to adjacent fingers. A design that looks balanced from the top can feel bulky from the side. A delicate render can produce weak prongs. A dramatic low gallery may prevent a wedding band from sitting beside the engagement ring. Good ring design therefore treats appearance, fit, construction, and production as one problem.
You do not need to be able to draw perfectly. A useful concept can begin with reference images, rough thumbnails, notes, a collage, clay, wax, or a simple digital model. What matters is that the design decisions become specific enough for a jeweler or manufacturer to interpret consistently.
Start with a Ring Design Brief
Before sketching details, write a one-page brief. This prevents the project from drifting toward attractive features that do not serve the wearer or price point. Answer the following questions:
- Purpose: Is it an engagement ring, wedding band, signet ring, fashion ring, memorial piece, promise ring, or collection sample?
- Wear pattern: Will it be worn every day, occasionally, during work, or only for events?
- Wearer: What ring size, finger, hand proportions, comfort preferences, and lifestyle should the design accommodate?
- Style: Should the ring feel minimal, classic, vintage, geometric, organic, architectural, or ornate?
- Material: Which metal, alloy, color, finish, and optional plating are appropriate?
- Stone plan: Is there a center stone, several stones, an inlay, engraving, enamel, or no decorative material?
- Budget and quantity: Is the ring a one-off piece, a sample, or a design intended for repeat production?
- Deadline: How much time is available for design review, prototyping, revision, production, setting, and inspection?
If the design is for another person, separate requirements from preferences. Ring size and a nickel sensitivity are requirements. A preference for a high setting or warm metal color may be negotiable. This distinction helps resolve conflicts when one choice affects another.
Ring Design Styles Compared
The architecture establishes the ring's visual hierarchy and many of its engineering constraints. The table below compares common starting points. Each can be adapted, but changing the center-stone size, setting height, band width, or material may change the tradeoffs.
| Ring Architecture | Visual Effect | Wear Profile | Main Design Decision | Manufacturing Consideration | Common Risk |
|---|---|---|---|---|---|
| Solitaire | One dominant center stone with a clean silhouette | Can be low or high depending on the head and gallery | Stone shape, setting type, height, and shoulder transition | Prongs or bezel must match the actual stone dimensions | An oversized head can look disconnected from a narrow shank |
| Bezel-set | Modern outline with metal surrounding the stone | Often smooth and practical for active wear | Full versus partial bezel and desired stone exposure | Seat accuracy and even metal coverage are critical | A heavy bezel can visually reduce the stone or trap debris |
| Halo | A larger face-up presence created by surrounding stones | More detailed surface and more potential contact points | Center-to-halo spacing, outline, and under-gallery access | Small-stone seats and shared metal must remain consistent | A crowded halo can appear uneven and be difficult to service |
| Three-stone | Wide focal composition with a center and two side stones | Finger coverage varies with stone size and angle | Proportion, alignment, side-stone angle, and shared support | All three stones need compatible heights and secure seats | Side stones can crowd adjacent fingers or dominate the center |
| Signet | Bold top surface for engraving, relief, stone, or plain polish | Substantial, with tapered shoulders distributing visual weight | Face shape, face dimensions, shoulder taper, and engraving depth | Solid versus hollow construction changes weight and finishing | An abrupt shoulder transition can look bulky and feel unbalanced |
| Stone-set band | Continuous or partial line of repeated stones | Low profile is possible; full eternity designs are harder to resize | Coverage, setting style, stone count, and plain sizing area | Repeated seats require tight spacing and size control | Too little metal between stones can weaken the structure |

How to Design a Ring Step by Step
1. Define the wearer and use
Design for the real wearing conditions. Someone who uses gloves, works with machinery, lifts weights, or frequently catches jewelry on textiles may prefer a lower profile and smoother edges. An occasional cocktail ring can prioritize scale and visual drama. An heirloom engagement ring needs a plan for long-term inspection and service.
Consider how the ring will interact with neighboring fingers and other rings. A wide top may look impressive from above but press against adjacent fingers. A rough gallery can rub. An engagement ring and wedding band should be evaluated as a pair if they are expected to sit together.
2. Establish size, width, and interior fit
Confirm the sizing system and target size before finalizing the model. Ring size describes the interior, but the same nominal size can feel different when the band becomes wider, heavier, flatter inside, or less able to pass over the knuckle. A wide band may need a different fitting decision than a narrow band.
Choose an interior profile. A traditional flat interior offers a familiar construction. A comfort-fit interior is curved toward the edges and may slide over the knuckle differently. Record whether the size applies before or after plating and final polishing, because surface finishing can affect tight tolerances.
3. Make thumbnail sketches
Draw several small ideas before refining one. Show at least the top, side, and end views. The top view establishes outline and symmetry. The side view reveals height, gallery shape, stone exposure, and wedding-band clearance. The end view shows how the shoulders meet the setting and whether the ring feels too narrow or too bulky.
Keep each early sketch focused on one structural idea. Compare a straight shank with tapered shoulders, a prong head with a bezel, or a low gallery with a cathedral profile. Small variations are easier to judge side by side than inside one complicated drawing.
4. Choose the metal and surface finish
Metal affects color, weight, fabrication, casting behavior, finishing, wear, care, and cost. Sterling silver is versatile and suitable for many detailed designs, but its dimensions and stone-setting structures must still be appropriate for the piece. Gold alloys vary in color and working properties. Platinum, titanium, tungsten carbide, stainless steel, and brass require different production and sizing assumptions.
Specify solid metal versus plated construction. If plating is used, define the base metal, barrier layers where applicable, target color, finish, and any protective topcoat. A polished surface reflects edges and imperfections clearly. Satin, brushed, hammered, sandblasted, and high-polish finishes change the apparent form and should be represented on the approved sample.
5. Select stones by dimensions, not name alone
Choose the stone species or simulant, shape, face-up dimensions, depth, quantity, quality range, and orientation. Carat is a weight measurement, so two stones with the same stated weight can have different dimensions. A setting should be engineered around the actual calibrated range or the specific stone supplied.
Think about exposure. A high open setting can admit more light and reveal the stone profile, but it may snag more easily. A low protective setting can improve wearability, but it must still allow cleaning and safe setting access. Fragile corners on princess, pear, marquise, and other fancy shapes need appropriate protection.
6. Choose a setting system
Prongs expose more of the stone and create a light visual structure. Bezels surround the edge and produce a smooth outline. Channel settings hold rows between metal walls. Pave and bead settings create a field of small stones. Flush settings place stones into the metal surface. Each system requires different seat geometry, metal distribution, tools, and service expectations.
Do not select a setting only from the front view. Inspect the under-gallery, supports, cleaning access, shared prongs, contact points, and transition into the shank. Every stone should be retained by an intentional structure rather than decorative metal that merely appears close to it.
7. Engineer the ring from every angle
Define the shank width and thickness, shoulder shape, setting height, gallery, bridge, prongs or bezel, stone seats, inside profile, and clearances. There is no universal dimension that is correct for every ring. The appropriate value depends on alloy, ring size, stone load, manufacturing method, design geometry, finishing allowance, and expected wear.
Avoid sudden thin areas and unsupported decorative elements. Keep enough material where the shank meets the setting, where stones interrupt the band, and where polishing will remove metal. If the ring must be resized later, preserve a suitable plain area when the design allows it.

8. Build a CAD model or measured technical drawing
CAD is useful for precise symmetry, repeated elements, stone layout, volume estimates, section views, and controlled revisions. A designer can inspect the ring at large scale, rotate it, compare versions, and create a model for resin printing or machining. A technical drawing can also work when the construction and measurements are complete.
Do not approve only a beauty render. Ask for neutral views that reveal the top, sides, end, underside, and interior. Review section thicknesses, ring size, overall height, stone measurements, setting contacts, and stacking clearance. A render can hide thin walls, inaccessible polishing areas, and impractical settings behind lighting and perspective.
9. Review a physical prototype
A resin or wax prototype lets you judge scale and geometry before precious-metal production. Check the ring on a mandrel and, when appropriate, on a fit model. Look at finger coverage, top weight, shoulder transition, clearance between fingers, profile height, and how the design sits beside another band.
Prototype material does not perfectly reproduce the weight, hardness, polish, setting behavior, or color of the finished metal. Use it to evaluate form and fit, then confirm material-dependent details on the production sample.
10. Approve a finished sample and specification
The production sample is where the design becomes evidence. Inspect the ring under normal lighting and magnification. Confirm size, dimensions, weight range, stone identity and count, stone alignment, setting security, symmetry, finish, plating color, engraving, comfort, and packaging requirements.
Record every approved detail in a specification rather than relying on the sample alone. Photographs help, but measurements, material declarations, finish references, tolerances, and inspection criteria make repeat production more consistent. For a custom project, a structured ring design and manufacturing service can translate the brief into CAD, sampling, revision, and production decisions.
How to Design an Engagement Ring
Begin with the center stone because it controls much of the setting geometry. Confirm its shape and actual dimensions, then decide how much of the stone should be visible, how high it should sit, and whether it needs corner or edge protection. Choose the viewing priority: maximum face-up prominence, a low practical profile, a dramatic side gallery, or a wedding-band-friendly structure.
Next, connect the setting to the shank. Straight shoulders keep the center visually independent. Tapered or cathedral shoulders guide the eye upward and can support the head. Split shanks create negative space but require careful alignment. Side stones add width and symbolism while increasing setting and maintenance complexity.
If a wedding band will be worn beside the ring, model both pieces together. Decide whether they should sit flush, leave an intentional gap, contour around the engagement ring, or interlock. Do not assume a standard straight band will clear the basket or center setting.
How to Design a Wedding Band
A wedding band may look simple, but its proportion and interior shape determine comfort. Select width, thickness, edge profile, inside fit, finish, and any stone coverage. Compare a flat band, half-round band, knife-edge band, beveled band, and softly squared profile on the hand rather than only in a render.
For stone-set bands, decide whether stones cover the top, half, three-quarters, or full circumference. Partial coverage preserves a plain sizing area and protects some stones from palm-side contact. Full eternity construction creates a continuous appearance but limits conventional resizing and requires consistent stone spacing around every size.
When the band accompanies another ring, specify the pair as a set. Match or intentionally contrast metal color, height, edge shape, stone size, finish, and visual rhythm. Check whether prongs or sharp edges on one ring can abrade the other.
How to Design a Signet Ring
Start with the face: oval, round, cushion, rectangular, shield, or an original outline. Define its dimensions, orientation, crown or flatness, and whether it will be plain, engraved, enamelled, relief-carved, or stone-set. Then taper the shoulders into a shank that balances the top without becoming unnecessarily heavy.
Decide between solid and hollowed construction with the manufacturer. A lighter interior can reduce weight and material cost, but cavities, walls, polishing access, and structural transitions must be designed intentionally. Engraving depth and artwork should suit the available surface and finishing process.
How to Design a Ring Online
Online configurators are useful for exploring combinations of metal color, stone shape, setting style, and band details. They are best treated as concept tools. A configurable image may not show exact dimensions, structural transitions, stone-seat geometry, or the result on a particular hand.
For an original design, collect front and side references, write the brief, and request measured CAD views. Review revisions using a numbered list so decisions remain traceable. Ask what file or output is being approved: a concept render, manufacturing CAD, printable model, resin prototype, or finished sample. These are different milestones.
Appearance Versus Manufacturability
The best solution is not to make every feature heavier. It is to place material where loads, setting forces, wear, and finishing require it while preserving the intended visual language. A fine-looking ring can have a strong internal structure. A visually substantial ring can still fail if it contains abrupt transitions, poorly supported settings, or inaccessible finishing areas.
Production method matters. Fabricated sheet and wire, lost-wax casting, machined alternative metals, stamped components, and assembled findings impose different rules. A design that works in gold may need adjusted dimensions or a different process in sterling silver. A tungsten carbide ring is not simply a silver design rendered in another color. Confirm the process before freezing the geometry.
What Makes a Ring Design Expensive?
Cost is driven by more than the amount of metal. Important factors include stone type and size, metal and weight, custom CAD, model making, casting complexity, number of components, stone count, setting labor, engraving, enamel, special finishes, plating, sample revisions, quality requirements, packaging, and order quantity.
Complexity should earn its place. A hidden halo, elaborate gallery, or mixed finish can strengthen the concept, but each adds work and inspection points. If a feature cannot be seen, felt, explained, or justified by the design, remove it before sampling.
Designing a Ring for Repeat Production
A design intended for a collection needs a broader plan than a one-off ring. Define the size range, permitted stone variation, color options, metal options, plating specifications, target weight, acceptable tolerances, packaging, reorder process, and inspection sampling. Test how the model behaves at the smallest and largest sizes rather than scaling one ring blindly.
Create a design family using controlled variables. One architecture may support several center-stone shapes, metal colors, or finishes. Keep the shank language, gallery motif, edge profile, and proportions recognizable across the family. This approach produces variety without making every style a completely separate engineering project.
Approve a master sample and retain unambiguous records. For wholesale buyers, compare the approved dimensions and finish against incoming batches, not only the product photograph. An existing collection of wholesale 925 sterling silver rings can also provide useful references for practical profiles, settings, and price-positioning before developing an original range.
Common Ring Design Mistakes
- Designing only the top view: the side and underside determine height, comfort, support, cleaning access, and stackability.
- Using carat weight as a dimension: setting geometry needs actual length, width, depth, girdle, and shape information.
- Ignoring band width during sizing: a wide band may fit differently from a narrow sizing sample.
- Making prongs decorative rather than structural: every stone-retaining element must contact and protect the stone as intended.
- Approving a render as the final sample: lighting cannot prove weight, finish, fit, or stone security.
- Forgetting polishing allowance: edges, prongs, engraving, and textures can change during finishing.
- Mixing incompatible processes: material and manufacturing route must be decided before final geometry.
- Leaving the specification incomplete: color names and photographs alone are not enough for repeat production.
- Skipping a wear test: finger clearance, rotation, snagging, balance, and stacking are difficult to judge on screen.
Ring Design Specification Checklist
- Project name, version number, date, and approval status
- Ring type, intended wearer, wear conditions, and target price position
- Sizing system, target size, size range, and interior profile
- Top, side, end, underside, and section views
- Overall height, top dimensions, shank width, shank thickness, and key clearances
- Metal, alloy, weight range, finish, plating, and color reference
- Stone material, shape, dimensions, quantity, quality range, orientation, and setting style
- Engraving, logo, hallmark, texture, enamel, or inlay requirements
- Manufacturing process and prototype requirements
- Approved sample photographs and measurable acceptance criteria
- Packaging, labeling, care information, and order quantity
FAQ
Can I design my own ring if I cannot draw?
Yes. Use reference images, written notes, rough shapes, and examples of features you like or dislike. A designer can translate the brief into measured drawings or CAD. Clear decisions are more valuable than polished illustration skills.
What should I decide first when designing a ring?
Decide the purpose, wearer, size, wear frequency, budget, metal, and primary visual idea. If the ring contains a center stone, confirm its shape and dimensions early because the setting and proportions depend on it.
Do I need CAD to design a ring?
No. Rings can be fabricated from measured drawings or modeled directly in wax. CAD is especially useful for precise symmetry, repeated elements, controlled revisions, stone layouts, and designs intended for repeat production.
What is the difference between a ring sketch and ring CAD?
A sketch communicates concept, silhouette, mood, and relationships. CAD defines three-dimensional geometry and measurable surfaces that can be evaluated and used to create a model. Neither replaces approval of the physical sample.
How long does it take to design a custom ring?
The schedule depends on the number of revisions, stone sourcing, prototype method, manufacturing process, setting, finishing, and inspection. Build time into the plan for design approval and at least one physical review rather than treating production as the only stage.
How do I choose the right ring setting?
Match the setting to the stone dimensions, shape, durability, desired visibility, wearing conditions, profile height, and service expectations. Prongs, bezels, channels, pave, and flush settings solve different visual and structural problems.
Should an engagement ring sit flush with the wedding band?
Only if that is part of the design brief. Some pairs sit flush, some use a contoured band, and others preserve an intentional gap. Model and sample the pair together if their relationship matters.
Can every ring design be resized?
No. Continuous stone settings, inlays, engraving, complex patterns, alternative metals, and unusual constructions can limit or prevent conventional resizing. Include future size service in the brief before finalizing the design.
How many revisions should a ring design have?
There is no required number. Revise until the brief, geometry, materials, dimensions, and production requirements agree. Use version numbers and consolidate feedback so each revision has a clear purpose.
What should I inspect on the finished ring sample?
Check size, fit, symmetry, dimensions, weight, stone identity and count, alignment, stone security, surface finish, plating color, edges, engraving, comfort, stackability, and consistency with the approved specification.
Final Answer
Design a ring by solving the decisions in the correct order: wearer and purpose, size and fit, visual architecture, material, stone and setting, three-dimensional structure, CAD or technical drawing, prototype, finished sample, and production specification. Keep the top, side, underside, and interior connected throughout the process. The result should look intentional, feel comfortable, protect its stones, and remain practical to manufacture and inspect.
OahlanJewelry Blog Tips
Readers are welcome to read the message and comments, and give their opinions, we will humbly adopt. Reproduction is prohibited without the permission of Oahlan.
Sample lookbook gallery